As any of my regular readers know I am absolutely not a fan of waste and like to try to avoid it as much as possible.
We had gotten a free fire pit from a neighbor that was moving and within the week of getting it, it was perfect bonfire weather. Better still, the neighborhood maintenance had come through our bachelorhood and done tons of tree trimming. Wanting desperately to make bio-char but having not moved yet I would have to settle for the usual byproduct of a bonfire, ash - which I would be saving to use for dust baths for our future chickens (and I did, but I ended up having to leave it with many other things at the old place).
First I found a few toilet paper rolls that had not yet found their way into the compost or recycling bins. Then I checked the dryer for dryer lint.
I sat the toilet paper rolls on end and lightly stuffed them. I made sure that the lint should be in contact with all sides of the roll but that it was not tightly packed (didn't want to make air flow too difficult.)
These really didn't seem to work any better than any other form of kindling. Will it work? yes. Is it any better than something else? I really don't think so.
HOWEVER!
Dryer lint IS extremely flammable and I found I was able to light it on fire with plenty of ease to begin fires in our fire pit.
Showing posts with label DIY. Show all posts
Showing posts with label DIY. Show all posts
Friday, April 17, 2015

Tuesday, April 14, 2015
Pintesting - Untangling Doll Hair

I got everything that was going to be needed together.

The pin says to use 2 tbspns fabric softener. Already having my hands full with other things I just went with two "glugs" out of the fabric softener bottle and into my spray bottle that seemed the appropriate equivalent. Then i filled the rest of my bottle with water and shook it up to mix.
I believe my spray bottle is supposed to hold around 6 ounces.
I began by using a fine mist but by the end I was going pretty heavy handed with the spray. Just remember it's always easier to add to than to take away.
To de-tangle the dolly in questions tresses you should, like with your own hair, begin at the tips and work up to the roots to avoid fairy knots. The entire process took me around 5 - 10 minutes which is about as long as it can sometimes take to do this same thing with my daughter.
The results were worth the effort though :)

Thursday, June 13, 2013
Home-made Non-Toxic Chemical-Free Unhyphenated-Glue
So sorry about that title - I think I'm funny.
Anyhow I had a craft in mind that was going to call for glue and shocker of shockers I preferred to keep my project as natural and child-safe as I felt I could.
I found this recipe for home-made glue using a simple Google search.
I got all my materials together.

Put the flour into the jar first.

Then water.
 Then the sugar and vinegar.
I gave it a good shake but saw there was still a noticable amount of flour at the bottom so I used an iced tea spoon to reach in and stir the rest of the mix.
 I tried the glue out and it was a bit watery and didn't seem to be bonding my items at all.
 I ended up just using Gorilla Glue to make sure my choking hazard wouldn't be coming off any time soon.
After letting the glue sit for a while the glue would separate so I would just shake the jar a bit.
After all that work when I began to write my post I realized I spaced out on a pretty important step. I needed to heat the glue. No wonder it wasn't working for me!!!
Anyhow I had a craft in mind that was going to call for glue and shocker of shockers I preferred to keep my project as natural and child-safe as I felt I could.
I found this recipe for home-made glue using a simple Google search.
I got all my materials together.

Put the flour into the jar first.

Then water.

I gave it a good shake but saw there was still a noticable amount of flour at the bottom so I used an iced tea spoon to reach in and stir the rest of the mix.


After letting the glue sit for a while the glue would separate so I would just shake the jar a bit.
After all that work when I began to write my post I realized I spaced out on a pretty important step. I needed to heat the glue. No wonder it wasn't working for me!!!
Friday, May 10, 2013
Make Your Own Liquid Castille Soap
I've gotten to the point where I'm using quite a lot of liquid castille soap and that cost can really add up. Dr. Bonner's bars are cheaper than the liquid soap so I decided to try my hand at that.
I got out my new grater, a bar of Dr. Bonner's, and a bowl. I have no idea why I keep getting out these small bowls, the shavings always end up falling all over the place. Usually I begin over a bowl then remember I need to do it over my "making stuff" bucket.

Anyhow, grate your soap as fine as you dare. The finer the grating the less you need to worry about making sure everything will dissolve into water.

I transferred my shavings to my bucket then added 10 cups of hot water. Then I used my immersion blender to mix everything really well.
Then wait 24 hours.
It will have gelled up similar to how home-made laundry detergent will.
 Then use an immersion blender to break it up really well and you're pretty much good to go.
This way your soap comes out a bit thick. So if you want it much closer to the consistency that it comes out of the bottle just add more water until you're happy with the consistency you now have.
I have to be honest, after using this method I still kinda prefer the liquid I buy. I'll just have to keep trying until I get the results I want.
I got out my new grater, a bar of Dr. Bonner's, and a bowl. I have no idea why I keep getting out these small bowls, the shavings always end up falling all over the place. Usually I begin over a bowl then remember I need to do it over my "making stuff" bucket.

Anyhow, grate your soap as fine as you dare. The finer the grating the less you need to worry about making sure everything will dissolve into water.

I transferred my shavings to my bucket then added 10 cups of hot water. Then I used my immersion blender to mix everything really well.
Then wait 24 hours.
It will have gelled up similar to how home-made laundry detergent will.

This way your soap comes out a bit thick. So if you want it much closer to the consistency that it comes out of the bottle just add more water until you're happy with the consistency you now have.
I have to be honest, after using this method I still kinda prefer the liquid I buy. I'll just have to keep trying until I get the results I want.
Thursday, May 9, 2013
Pintesting - Chemical-Free Body Wash
I was out of the body wash my mother was so kind to buy for me and feeling indignant about buying more. I mean why do that when I could make my own and have a lot more control over what would and would not be in it?
 Today's pintest comes via this pin and the info found here.
You will need:
1/2 Gallon distilled water - I'd actually already bought a gallon. Yes, I see how it seems a bit silly to buy distilled water but not body wash.
 2 cups grated bar soap - I knew I wanted something organic. I ended up choosing a Nubian Heritage soap because their products are certified organic, contain fair trade ingredients; and are free from parabens, sulfates, phthalates, mineral oil, petrolatum, DEA, PABA, synthetic fragrance, artificial color, and animal testing.
 2 tbsp vegetable glycerine oil

I grated my soap and stored it in a Mason jar along with the label from the box so I wouldn't forget what was in the jar or what volume the soap had come in when I'd gotten it.
 Melt 2 cups grated soap in 1/2 gallon distilled water
 Along with 2TBSP of Vegetable Glycerin oil
I also chose to add a few drops of tamanau oil.
 Mix well.
I poured the mixed soap, water, glycerine, and oil into half of a milk jug I had around and used the handle to neatly pour the body wash into my container.
 There was more there than it took to fill my original container so I also called upon a Mason jar to come to my aid.
 The mix gelled in about an hour I'd say.
The body wash wash low-lather but definitely did its job. My skin was left soft and clean.

You will need:
1/2 Gallon distilled water - I'd actually already bought a gallon. Yes, I see how it seems a bit silly to buy distilled water but not body wash.


I grated my soap and stored it in a Mason jar along with the label from the box so I wouldn't forget what was in the jar or what volume the soap had come in when I'd gotten it.


I also chose to add a few drops of tamanau oil.

I poured the mixed soap, water, glycerine, and oil into half of a milk jug I had around and used the handle to neatly pour the body wash into my container.


The body wash wash low-lather but definitely did its job. My skin was left soft and clean.
Thursday, May 2, 2013
What To Do About A Dishwasher Full of Beeswax Pt. 1
After my recent attempt to make cotton beeswax cloth you may remember I made a little mess of my new food processor. I put it into the dishwasher without a second thought and I really wish I would have thought a few minutes more before I did it.
Wash, after wash, after wash, after wash, after wash and my dishes still looked like this.
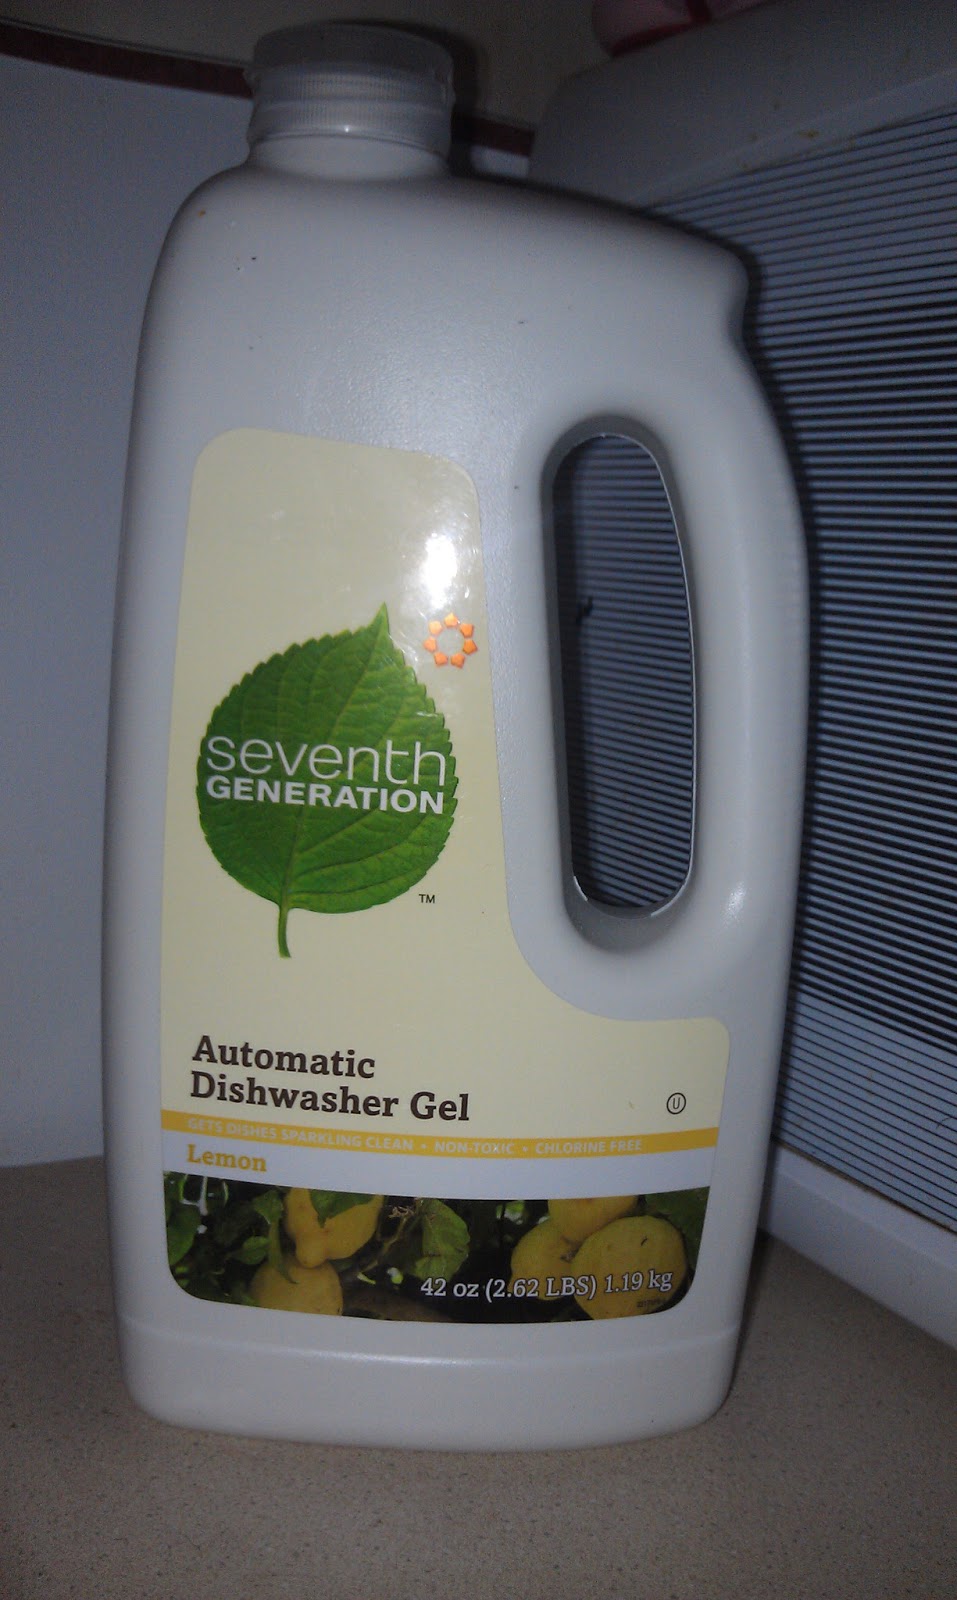
 I tried my usual seventh generation dishwasher cleaner a couple times.
 I tried seventh generation with a white vinegar chaser.
I tried baking soda in the washing compartment and a vinegar chaser.
It still looked bad . . verging on hopeless.
 When you search online for ways to clean beeswax off of your dishes you really don't come back with much. This fact is only made worse when you have a dishwasher full of really messed up, beeswax coated dishes.
Eventually I came across a post where a woman mentioned the use of Goo Gone. I don't have any and I don't know a lot of about what's in it. Did I mention it was also snowing?
Alright Pintrest don't fail me now. I looked up DIY Goo Gone, deciding to put whatever I came up with into the dishwasher and hope that I didn't make the problem 917,230,127,471,934,279,842,703,827,598,709,835,709,482 times worse - which at the rate I was going seemed a lock.
The first pin I clicked and began to look at involved vitamin E oil, already having a lot of other uses for my vitamin E oil and preferring not to use it for this until I had to I chose a different one.
This one called for a 1:1 ratio of baking soda and vegetable oil. I knew I had baking soda and was relatively certain that I had vegetable oil. I thought to myself, "I'm DOIN' this!" - not like I felt like I had much other choice at this point.
 Things get really serious in my kitchen pretty quickly.
 I mixed my 1:1 using the last clean measuring cup I could find.
 Mix it well - I only had about 4 spoons left, two of which were absinthe spoons, and another was an iced tea spoon.
 Classy right? For anyone interested my absinthe spoons are reproductions of the type Henri de Toulouse-Lautrec used.
 I poured approximately 1/3 cup of my goo gone into the washing compartment, turned on my washing machine and hoped my greatest hope that it would work.
 After a cycle through the washing machine things were looking a bit cleaner albeit they felt a little oily.

 Considering this a good sign I ran it again with my homemade Goo Gone to be followed up with vinegar.

 Still oily but everything looked clean enough to clean it the usual way. The result was a bit dissapointing. Still oily, looked cleaner than it all began, but it seemed quite a bit of residue was still there!

 I opted to change my game a bit and use this pin which calls to do the same thing as before but uses borax. I put the mixture on the dishes and left it to sit for a little while and then ran the dishwasher with the previous mix.
The dishes were improving but they still weren't coming out as clean as I needed. But after a day of trying to ash them the usual way and without any dish washing detergent and then today I needed a break. I'd have to try again the next day.
Wash, after wash, after wash, after wash, after wash and my dishes still looked like this.

I tried baking soda in the washing compartment and a vinegar chaser.
It still looked bad . . verging on hopeless.

Eventually I came across a post where a woman mentioned the use of Goo Gone. I don't have any and I don't know a lot of about what's in it. Did I mention it was also snowing?
Alright Pintrest don't fail me now. I looked up DIY Goo Gone, deciding to put whatever I came up with into the dishwasher and hope that I didn't make the problem 917,230,127,471,934,279,842,703,827,598,709,835,709,482 times worse - which at the rate I was going seemed a lock.
The first pin I clicked and began to look at involved vitamin E oil, already having a lot of other uses for my vitamin E oil and preferring not to use it for this until I had to I chose a different one.
This one called for a 1:1 ratio of baking soda and vegetable oil. I knew I had baking soda and was relatively certain that I had vegetable oil. I thought to myself, "I'm DOIN' this!" - not like I felt like I had much other choice at this point.


The dishes were improving but they still weren't coming out as clean as I needed. But after a day of trying to ash them the usual way and without any dish washing detergent and then today I needed a break. I'd have to try again the next day.
Wednesday, April 24, 2013
Plastic Wrap Alternative - DIY Cotton Beesewax Wraps
Plastic is everywhere and it's so daunting that most people seem to decide, "What's the use?" and not bother trying. For a lot of people plastic wrap is an item receiving every day use in their household. How can you kick the habit of using something that has become so integral? By using beesewax cotton wraps.
I learned about this source post from My Healthy Green Family for todays craft while I was perusing the My Plastic Free Life Facebook fan page.
Although I can happily say that we do not use much plastic wrap in our house I can't say that we don't have a regular use for it. How can that be? I've never really bought it so there's never any in the house, but my husband tends to be a lot of leftovers in the fridge completely uncovered. By creating a plastic wrap alternative to provide a man that I sometimes have a hard time getting to put things in our recycled plastic containers I stand a better chance of not finding a bowl of baby cereal/food all dried out on the top shelf of our refrigerator.
I started off with some fabrics that this seemed like a good job for.
 The directions say to pre-heat your oven to 185F, but I had to cope with 200F.
Place pre cut fabric on cookie sheet.
Sprinkle evenly and lightly with grated beeswax. You don’t need a lot!
 Place in preheated oven. Watch carefully! This should take 5 minutes or less.
As soon as the beeswax is just melted, remove from oven.
Spread wax evenly with paintbrush to cover over any spots that are not yet coated.
 The directions say to hang on makeshift clothes line with clothes pegs, to dry. That wasn't really much of an option for me so I laid them out dry on some foil.
They ended up pretty stiff. The author says that once cooled, you can use these wraps. I felt a bit compelled to wash mine before use to see if that loosened them up a bit.
The results after washing were not positive. The wax was piecy, uneven, and cracked. I actually considered throwing what I had left away! But that would go against my feelings about needless waste. I'll have to find another use for this fail.
I learned about this source post from My Healthy Green Family for todays craft while I was perusing the My Plastic Free Life Facebook fan page.
Although I can happily say that we do not use much plastic wrap in our house I can't say that we don't have a regular use for it. How can that be? I've never really bought it so there's never any in the house, but my husband tends to be a lot of leftovers in the fridge completely uncovered. By creating a plastic wrap alternative to provide a man that I sometimes have a hard time getting to put things in our recycled plastic containers I stand a better chance of not finding a bowl of baby cereal/food all dried out on the top shelf of our refrigerator.
I started off with some fabrics that this seemed like a good job for.

Place pre cut fabric on cookie sheet.
Sprinkle evenly and lightly with grated beeswax. You don’t need a lot!

As soon as the beeswax is just melted, remove from oven.
Spread wax evenly with paintbrush to cover over any spots that are not yet coated.

They ended up pretty stiff. The author says that once cooled, you can use these wraps. I felt a bit compelled to wash mine before use to see if that loosened them up a bit.
The results after washing were not positive. The wax was piecy, uneven, and cracked. I actually considered throwing what I had left away! But that would go against my feelings about needless waste. I'll have to find another use for this fail.
Monday, April 8, 2013
Diaper Rash Cream
Full of parental paranoia and worry I decided to also make some diaper cream. If you cloth diaper do not apply this to your childs' bottom and then put them into the cloth diaper. The oils will keep the cloth from doing its absorbent job and void any warranty your diaper may still have. Use a diaper liner to protect the diaper. Then you have a layer between baby booty, oil, and the cloth of your diaper.
To make it I took a little bit of coconut oil,

Put it into a bowl and did my best to stir it until it was "whipped" in texture,

then I added a bit of my baby powder. Mix the two together until you get a reasonable texture.
Store in an airtight container.
 Diaper cream, made at home, chemical and talc-free!
To make it I took a little bit of coconut oil,

Put it into a bowl and did my best to stir it until it was "whipped" in texture,

then I added a bit of my baby powder. Mix the two together until you get a reasonable texture.
Store in an airtight container.

Monday, April 1, 2013
Making Baby Wipes Out of (Recycled) Paper Napkins
We are out of baby wipes and I'd already decided that once we were out of store bought baby wipes we wouldn't be buying any more.
 Permanent lifestyle changes work out best by introducing them gradually. After dealing with three days off poop and cloth diaper fails I wasn't feeling ready to jump into the deep end of cloth wipes. I decided to start a little smaller to begin my habit.
I sent the hubs into a Kroger that regularly seems not to have the natural items I want with the instructions to buy recycled paper towels or none at all. He brought me these.
 I hoped I could make them work. The nice thing about them was that after you take some out the bag comes with 2 pull ties to re-close the bag.
 I put 1 teaspoon of Doctor Bonners mild baby soap
 5 drops of tea tree oil
 and then filled this glass of water most of the way.
 Stirred gently.
I put a handfull of the napkins into the now empty wipes container and poured a bit over the nappkins. It did not seem to be seeping in at all - just ruining the top napkins.
 I flipped them over and added some more. More of the same disappointing result so I took the ones I just poured on top of, grabbed about half of the stack of napkins, and put the wet ones in the center. Then I shook the container. Turning the container over wasn't an option because the little lamb had stolen the top.
 I waited 5 - 10 minutes and then went back in and checked on them. There didn't seem to be much change. I decided to leave them as is and then just try them as soon as they were needed.
My husband was the first to try these out He needed them the next morning and I'd call it a fail - he said the napkin ripped (shocker).

I sent the hubs into a Kroger that regularly seems not to have the natural items I want with the instructions to buy recycled paper towels or none at all. He brought me these.


I put a handfull of the napkins into the now empty wipes container and poured a bit over the nappkins. It did not seem to be seeping in at all - just ruining the top napkins.


My husband was the first to try these out He needed them the next morning and I'd call it a fail - he said the napkin ripped (shocker).
Tuesday, March 12, 2013
Homemade Vitamin Water
I used to love vitamin water, but I had an incident where someone slipped drugs into mine and it left me unable to stand the taste of it. Years before that even happened my husband, a die-hard sports nut, told me that under NCAA guidelines vitamin waters contained banned substances and that college athletes were being told they couldn't drink it.
These banned substances included taurine, L-theanine, green-tea extract and glucosamine. Withing a week of the link I provided you above vitamin water was given the green light. Hmmmmmm.
After dealing with the intense thirst that accompanies gestational diabetes I decided to try my hand at making my own.
For starters I chose to only make two.
One contained frozen pineapple and mango chunks along with some fresh mint.
 The other contained a frozen mixture of berries (raspberries, blackberries, and blueberries).
 Making these was simple. Just put your fruit in your chosen glass container, fill it with water, and then put it in the fridge for a minimum of 1 - 4 hours to let the water infuse. I left mine overnight.
The resulting concoction was okay but not what I was hoping for. We did however find that the drink tasted even better later in the day than in the beginning.
Still very interested a few days later I made a couple more.
 The one on the left has (frozen) blueberries, line, and cucumber. The one on the right has cucumber, lemon, mint, and ginger. These were pretty disgusting. The one on the left had way too much lime and the one on the right was just a bit of an amalgam of nasty.
I'm going to have to try this again with fresh fruit.
These banned substances included taurine, L-theanine, green-tea extract and glucosamine. Withing a week of the link I provided you above vitamin water was given the green light. Hmmmmmm.
After dealing with the intense thirst that accompanies gestational diabetes I decided to try my hand at making my own.
For starters I chose to only make two.
One contained frozen pineapple and mango chunks along with some fresh mint.


The resulting concoction was okay but not what I was hoping for. We did however find that the drink tasted even better later in the day than in the beginning.
Still very interested a few days later I made a couple more.

I'm going to have to try this again with fresh fruit.
Subscribe to:
Posts (Atom)