
Showing posts with label pintrest. Show all posts
Showing posts with label pintrest. Show all posts
Monday, September 23, 2013

Tuesday, May 21, 2013
Big Girl Panties
My little lamb has grown up so fast. Potty training had been going on for quite a while. I started to slowly introduce her to the potty around 18 months old. Some people seem to take a much harder nosed approach to potty training than I did. I really didn't want to discourage or rush her so we just started very slowly.
Very slowly got even slower when in the very very beginning of my pregnancy I was in a four-wheeling accident where I was thrown off the bike and hurt my wrist. My in-laws, of course, banned me from four-wheeling, but I already knew there would have to be no more of that until I'd had our next little lamb.
I did what I could to keep taking her to the potty despite the extreme pain in my wrist and urged my husband to sprint with her to the potty whenever he was around and I saw her make the poop face.
When she decided that she was ready to go whole hog on potty training it seemed to happen at once. She began taking off her diapers and occasionally would pee in the floor. This progressed to frequently telling me, "poop."
Now seems like a good time to let you all know the motivator we've been using in potty training, Anna's cookies. My father brought her some quite some time ago and she fell in love with them. He now sends us semi-regular shipments or brings copious amounts of them with him to make sure she has a stash of what we call, "grandpa cookies."
As soon as we saw we were getting someplace with potty training we told our little one that in the event she tells us that she needs to poop, we take her to the bathroom, and she actually poops - she could have three cookies. When she tells us, "poop", and only pees (she doesn't yet realize to tell us "pee-pee") she gets two cookies. When we take her ourselves and she pees or poops she gets one cookie.
This system generally works out really well. She did, of course, pick up that frequently after being in the bathroom she'd get cookies so occasionally she would say she needed to go, sit on the toilet for a bit, not do anything, and then tell you she should get a cookie. Sorry kiddo, that's not our deal.
Months before she decided she was "all in" on potty training I picked up some flannel to work on some training pants for her. She was really excited about the fabric I'd picked out. Big girl underpants seemed like a great motivator for potty training and the time was now upon me to finally make them.
First I found myself a tutorial - of course it came from Pintrest. I actually contacted the girl who wrote the tutorial asking if I sent her all of teh items needed to make these if she would make some at a discounted rate - her first response was that obviously it sounded like I could sew and she showed me the tutorial.
I accidentally bought the wrong sort of training pants as my base (they were plastic) so it took a while longer for me to get around to getting the correct ones. I was 30 weeks pregnant and panicking so I asked once more if she could help me but got no response.
Amazon had the second best price for a three pack of plain white Gerber training pants but sadly they were beat out by WalMart. Not in any real position to spend extra money I bought three packs of the underpants from WalMart.
 Much like you will need to do with a lot of projects you need a template and this is one of those instances where you're going to need to create it yourself. In the source post for the info I was using she used wax paper, which I don't tend to keep around the house.
Trace the seams of the section of underpants that are reinforced.
Here is the template I ended up with.
 Much like the original poster, I wanted to make certain I didn't mix up the front with the back of the template so I chose to label it.
Now use your template
 to cut 4 layers of flannel and 1 layer of PUL.
 The original poster said that the next step was to pin flannel in place inside the underpants
 and sew them down. She used a zig zag stitch much like I like to do with this sort of thing. But it never said how many layers of your flannel to use. I did two layers of PUL inside and on the outside from bottom to top was PUL, flannel, and then flannel.
My first template, as you can see, ended up not really being dead on with the seams. Which proved to be a big deal after I sewed everything down.

If this happens to you just do what I did and force yourself to put on your own big kid pants, remove the wonky seams,
 redo your template, and begin again.
Mine aren't 100% perfect but they still came out pretty well.

Now I just have to wait until the little lamb is really ready for these.
Very slowly got even slower when in the very very beginning of my pregnancy I was in a four-wheeling accident where I was thrown off the bike and hurt my wrist. My in-laws, of course, banned me from four-wheeling, but I already knew there would have to be no more of that until I'd had our next little lamb.
I did what I could to keep taking her to the potty despite the extreme pain in my wrist and urged my husband to sprint with her to the potty whenever he was around and I saw her make the poop face.
When she decided that she was ready to go whole hog on potty training it seemed to happen at once. She began taking off her diapers and occasionally would pee in the floor. This progressed to frequently telling me, "poop."
Now seems like a good time to let you all know the motivator we've been using in potty training, Anna's cookies. My father brought her some quite some time ago and she fell in love with them. He now sends us semi-regular shipments or brings copious amounts of them with him to make sure she has a stash of what we call, "grandpa cookies."
As soon as we saw we were getting someplace with potty training we told our little one that in the event she tells us that she needs to poop, we take her to the bathroom, and she actually poops - she could have three cookies. When she tells us, "poop", and only pees (she doesn't yet realize to tell us "pee-pee") she gets two cookies. When we take her ourselves and she pees or poops she gets one cookie.
This system generally works out really well. She did, of course, pick up that frequently after being in the bathroom she'd get cookies so occasionally she would say she needed to go, sit on the toilet for a bit, not do anything, and then tell you she should get a cookie. Sorry kiddo, that's not our deal.
Months before she decided she was "all in" on potty training I picked up some flannel to work on some training pants for her. She was really excited about the fabric I'd picked out. Big girl underpants seemed like a great motivator for potty training and the time was now upon me to finally make them.
First I found myself a tutorial - of course it came from Pintrest. I actually contacted the girl who wrote the tutorial asking if I sent her all of teh items needed to make these if she would make some at a discounted rate - her first response was that obviously it sounded like I could sew and she showed me the tutorial.
I accidentally bought the wrong sort of training pants as my base (they were plastic) so it took a while longer for me to get around to getting the correct ones. I was 30 weeks pregnant and panicking so I asked once more if she could help me but got no response.
Amazon had the second best price for a three pack of plain white Gerber training pants but sadly they were beat out by WalMart. Not in any real position to spend extra money I bought three packs of the underpants from WalMart.

Trace the seams of the section of underpants that are reinforced.
Here is the template I ended up with.

Now use your template


My first template, as you can see, ended up not really being dead on with the seams. Which proved to be a big deal after I sewed everything down.

If this happens to you just do what I did and force yourself to put on your own big kid pants, remove the wonky seams,

Mine aren't 100% perfect but they still came out pretty well.

Now I just have to wait until the little lamb is really ready for these.
Friday, May 17, 2013
Must Dash Quilt
Nearing the end of my second trimester and entirely through my third trimester of my pregnancy I became worried and obsessed with finishing my sons nursery before my due date. This was something I didn't manage to accomplish to my satisfaction.
My pal Sweety Darlin remarked at one point that my son would never notice, know, or care that his nursery was finished. Right as she was, I remained a woman possessed. Now that he's here I've calmed way down and very few of the unfinished nursery items bother me.
Two weeks into happily co-sleeping with our newest addition I realized that I actually had months until it mattered how finished it was.
Once his umbilical cord came off I was happy that now tummy time could begin. I'd already seen this quilt on Pinterest but now I had that "my-son-must-have-this" feeling. So I set to work.
I had my husband print out the template from the source post and bring it home.
Began digging through my fabric to see what I thought might best suit this project.
Hit up WalMart and checked their fat quarters, took a picture of the ones I was considering, texting them to a friend and asking her opinion.
 Going to JoAnns after I was once again unable to get someone to help me at the WalMart fabric counter. Get more fabric. Take pictures. Load them to instagram.
 I had my husband cut fat quarters off of the half-yards I'd bought at JoAnns.
 Then I cut the 10" blocks off as instructed.
Create a mustache template using some leftover cardboard. Cut myself with my rotary cutter. Bleed on the paper print out. Post the whole shenanigan to Instagram. Soldier on like a boss.
Cut the mustaches.
Cut out some mustache shaped fusible webbing. This I didn't do as well as I'd hoped so I ended up fusing the webbing to the mustache and then cutting off the excess.
No matter how hard I tried I couldn't get the mustaches with the fusible webbing on the backs to fuse to my blocks.
I was able to cut all my template, the mustaches, the webbing, and sew the mustaches onto the blocks all in the same day.
Now to begin laying out blocks and figure out the most appealing configuration for the blocks.
 Sew them together.
 I chose to get more of this adorable mustache fabric from JoAnns to use on the back of the quilt. I hope to have this finished soon.
 Meanwhile I'll still making other quilt tops.
My pal Sweety Darlin remarked at one point that my son would never notice, know, or care that his nursery was finished. Right as she was, I remained a woman possessed. Now that he's here I've calmed way down and very few of the unfinished nursery items bother me.
Two weeks into happily co-sleeping with our newest addition I realized that I actually had months until it mattered how finished it was.
Once his umbilical cord came off I was happy that now tummy time could begin. I'd already seen this quilt on Pinterest but now I had that "my-son-must-have-this" feeling. So I set to work.
I had my husband print out the template from the source post and bring it home.
Began digging through my fabric to see what I thought might best suit this project.
Hit up WalMart and checked their fat quarters, took a picture of the ones I was considering, texting them to a friend and asking her opinion.


Create a mustache template using some leftover cardboard. Cut myself with my rotary cutter. Bleed on the paper print out. Post the whole shenanigan to Instagram. Soldier on like a boss.
Cut the mustaches.
Cut out some mustache shaped fusible webbing. This I didn't do as well as I'd hoped so I ended up fusing the webbing to the mustache and then cutting off the excess.
No matter how hard I tried I couldn't get the mustaches with the fusible webbing on the backs to fuse to my blocks.
I was able to cut all my template, the mustaches, the webbing, and sew the mustaches onto the blocks all in the same day.
Now to begin laying out blocks and figure out the most appealing configuration for the blocks.


Thursday, May 9, 2013
Pintesting - Chemical-Free Body Wash
I was out of the body wash my mother was so kind to buy for me and feeling indignant about buying more. I mean why do that when I could make my own and have a lot more control over what would and would not be in it?
 Today's pintest comes via this pin and the info found here.
You will need:
1/2 Gallon distilled water - I'd actually already bought a gallon. Yes, I see how it seems a bit silly to buy distilled water but not body wash.
 2 cups grated bar soap - I knew I wanted something organic. I ended up choosing a Nubian Heritage soap because their products are certified organic, contain fair trade ingredients; and are free from parabens, sulfates, phthalates, mineral oil, petrolatum, DEA, PABA, synthetic fragrance, artificial color, and animal testing.
 2 tbsp vegetable glycerine oil

I grated my soap and stored it in a Mason jar along with the label from the box so I wouldn't forget what was in the jar or what volume the soap had come in when I'd gotten it.
 Melt 2 cups grated soap in 1/2 gallon distilled water
 Along with 2TBSP of Vegetable Glycerin oil
I also chose to add a few drops of tamanau oil.
 Mix well.
I poured the mixed soap, water, glycerine, and oil into half of a milk jug I had around and used the handle to neatly pour the body wash into my container.
 There was more there than it took to fill my original container so I also called upon a Mason jar to come to my aid.
 The mix gelled in about an hour I'd say.
The body wash wash low-lather but definitely did its job. My skin was left soft and clean.

You will need:
1/2 Gallon distilled water - I'd actually already bought a gallon. Yes, I see how it seems a bit silly to buy distilled water but not body wash.


I grated my soap and stored it in a Mason jar along with the label from the box so I wouldn't forget what was in the jar or what volume the soap had come in when I'd gotten it.


I also chose to add a few drops of tamanau oil.

I poured the mixed soap, water, glycerine, and oil into half of a milk jug I had around and used the handle to neatly pour the body wash into my container.


The body wash wash low-lather but definitely did its job. My skin was left soft and clean.
Tuesday, May 7, 2013
Pintesting - Crunchy Betty's Neosporin
My in-laws have a collection of wood and trash burning stoves around their house and this January my little lamb burned her hand when I wasn't in the room. Because she wasn't wailing and screaming about it my mother-in-law saw no cause for anyone to go get her some burn ointment.
This pin has been on my list for some time now and the burn made me wish I'd already made some of this. The information for this pin came from Crunchy Betty's blog post, "Not Your Mother's Neosporin: Healving Salve for Minor Scrapes and Burns".
At the beginning of the post "Betty" mentions how you could steep your herbs for two to three weeks but that she didn't feel the herbs would really blend well with the solid coconut oil you will be using. I chose to use all the herbs she mentions and boil them together with double the oil. When it came time to strain the herbs I strained everything into one sterilized jar. Marked the top of the liquid. Marked the center of the liquid. Then I poured half of it out to continue on as she explains for the quick brew, but then I put as many of the strained herbs back into my container with my heated oil to see how that may work as far as long-term steeping to get maximum potency of the herbs.
 It took me a while to get all of the necessary items to make this in stock around my house.
 Pulling everything out is always good but for this I think you should do a little additional prepping. For instance put the herbs you are intending to use in a bowl or something so that you won't have to measure as you're already in progress.
 The same really should be said for your bees wax.
 While I prepped I also sterilized my containers.
 Alright, you're ready to go now. Take your 1/2 c of coconut oil.
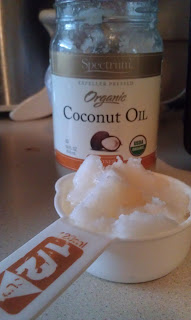 And your 1/2 c of grapeseed oil.
 I don't own a proper one so I rigged one of my own by mostly filling a large pot with water.
 And then placing a smaller pot inside of it. This creates your necessary double boiler. The smaller pot will be your working pot. Place your oils in there.
 On low heat combine your oils with your herbs to infuse the oil with the healing goodness of your herbs.
 I also was out of cheesecloth but I did have some undyed, fair trade, organic mesh that I failed at using to make re-usable produce bags. This worked as a great strainer after my 30 minutes of frequent stirring.
 Strain your herbs into yet another sterilized container.
 Wipe out your working pot, place the strained oil
 back into the pot with your beeswax and heat until the wax has melted.
 Once it melted I put everything into my half pint jar, mixed in the honey using the same teaspoon I used to measure it, and then used that teaspoon to put some of the mixture into two other containers.
Instead of standing and doing even more storing I put everything in the freezer. That would be frozen table scraps to compost in the back.
 Ever year my in-laws have a yearly firework war. There's nothing green about this and depending upon what kind of person you are this doesn't even sound like fun. This past year was the first year we bothered to incorporate protective eye-ware - via mandate of my father-in-law. But things like this are the reason I don't think it's such a horrible thing that this made so much Neosporin.
 I separated mine into one large container (that's a half-pint jar), and two 2-ounce tins (one for traveling for me and one for a friend.)
I waited the ten minutes and peeked at the "Neosporin" and it didn't seem ready yet so I chose to just get back to it when I felt like it. "Betty" warns against separating with the honey - it seems mine did anyway.
 To fix this just reheat until your salve has liquified again.
Then stir, stir, stir, stir to get that honey mixed in better than it previously was.
Six weeks after all of this I made anot her batch using the healing herbs that had been steeping and shaken daily. Despite my best efforts I still ended up with a puddle of honey at the bottom.
This pin has been on my list for some time now and the burn made me wish I'd already made some of this. The information for this pin came from Crunchy Betty's blog post, "Not Your Mother's Neosporin: Healving Salve for Minor Scrapes and Burns".
At the beginning of the post "Betty" mentions how you could steep your herbs for two to three weeks but that she didn't feel the herbs would really blend well with the solid coconut oil you will be using. I chose to use all the herbs she mentions and boil them together with double the oil. When it came time to strain the herbs I strained everything into one sterilized jar. Marked the top of the liquid. Marked the center of the liquid. Then I poured half of it out to continue on as she explains for the quick brew, but then I put as many of the strained herbs back into my container with my heated oil to see how that may work as far as long-term steeping to get maximum potency of the herbs.


Instead of standing and doing even more storing I put everything in the freezer. That would be frozen table scraps to compost in the back.


I waited the ten minutes and peeked at the "Neosporin" and it didn't seem ready yet so I chose to just get back to it when I felt like it. "Betty" warns against separating with the honey - it seems mine did anyway.

Then stir, stir, stir, stir to get that honey mixed in better than it previously was.
Six weeks after all of this I made anot her batch using the healing herbs that had been steeping and shaken daily. Despite my best efforts I still ended up with a puddle of honey at the bottom.
Monday, May 6, 2013
Pintest -Chemical-Free Cleaning - Dishwashing Detergent
I do a lot of dishes and when I say a lot I mean I pretty much have to do them every day. Frequently I do more than one load a day. Dish-washing detergent is another one of those extra expenses I've just been living with.
Having long-since switched to an ecologically safe brand I could at least take solace in that fact. Not having to run out and buy more whenever I run out would be even nicer though.
I've tried other pins about making your own dish-washing detergent and have so far been left feeling incredibly unimpressed. This one is supposed to gel - a trait I found promising.
Today's pintest comes via this pin and the info found here.
Bring 8 cups of water to boil.
 Turn off heat (I didn't have space to move the pot someplace else) and stir in washing soda, borax, and liquid castille until they dissolve.
 I used a whisk to do this. It dissolved quite quickly.
 Add 8 more cups of water and stir it in.
Pour cooled liquid into container of your choice.
 I waited 24 hours for it to "gel" but it didn't look quite right so I waited another 24 hours. My gel was watery in places and chunky in others.
 My husband tried it in the dishwasher and it left film all over our dishes.
I decided this may be one of those times where I was best off employing the use of my handy dandy immersion blender. I was really worried it was too late for this batch and that I would have to just try this again and use the immersion blender from the get go.
My first wash with the newly blended dish-washing detergent and a vinegar chaser produce sparkling clean dishes. My second attempt without the vinegar chaser left me with filmy dishes that I felt needed to be washed again.
Try, try again - I tried one more time but this time again with the vinegar in the jet dry again.
Having long-since switched to an ecologically safe brand I could at least take solace in that fact. Not having to run out and buy more whenever I run out would be even nicer though.
I've tried other pins about making your own dish-washing detergent and have so far been left feeling incredibly unimpressed. This one is supposed to gel - a trait I found promising.
Today's pintest comes via this pin and the info found here.
Bring 8 cups of water to boil.


Pour cooled liquid into container of your choice.


I decided this may be one of those times where I was best off employing the use of my handy dandy immersion blender. I was really worried it was too late for this batch and that I would have to just try this again and use the immersion blender from the get go.
My first wash with the newly blended dish-washing detergent and a vinegar chaser produce sparkling clean dishes. My second attempt without the vinegar chaser left me with filmy dishes that I felt needed to be washed again.
Try, try again - I tried one more time but this time again with the vinegar in the jet dry again.
Thursday, May 2, 2013
What To Do About A Dishwasher Full of Beeswax Pt. 1
After my recent attempt to make cotton beeswax cloth you may remember I made a little mess of my new food processor. I put it into the dishwasher without a second thought and I really wish I would have thought a few minutes more before I did it.
Wash, after wash, after wash, after wash, after wash and my dishes still looked like this.
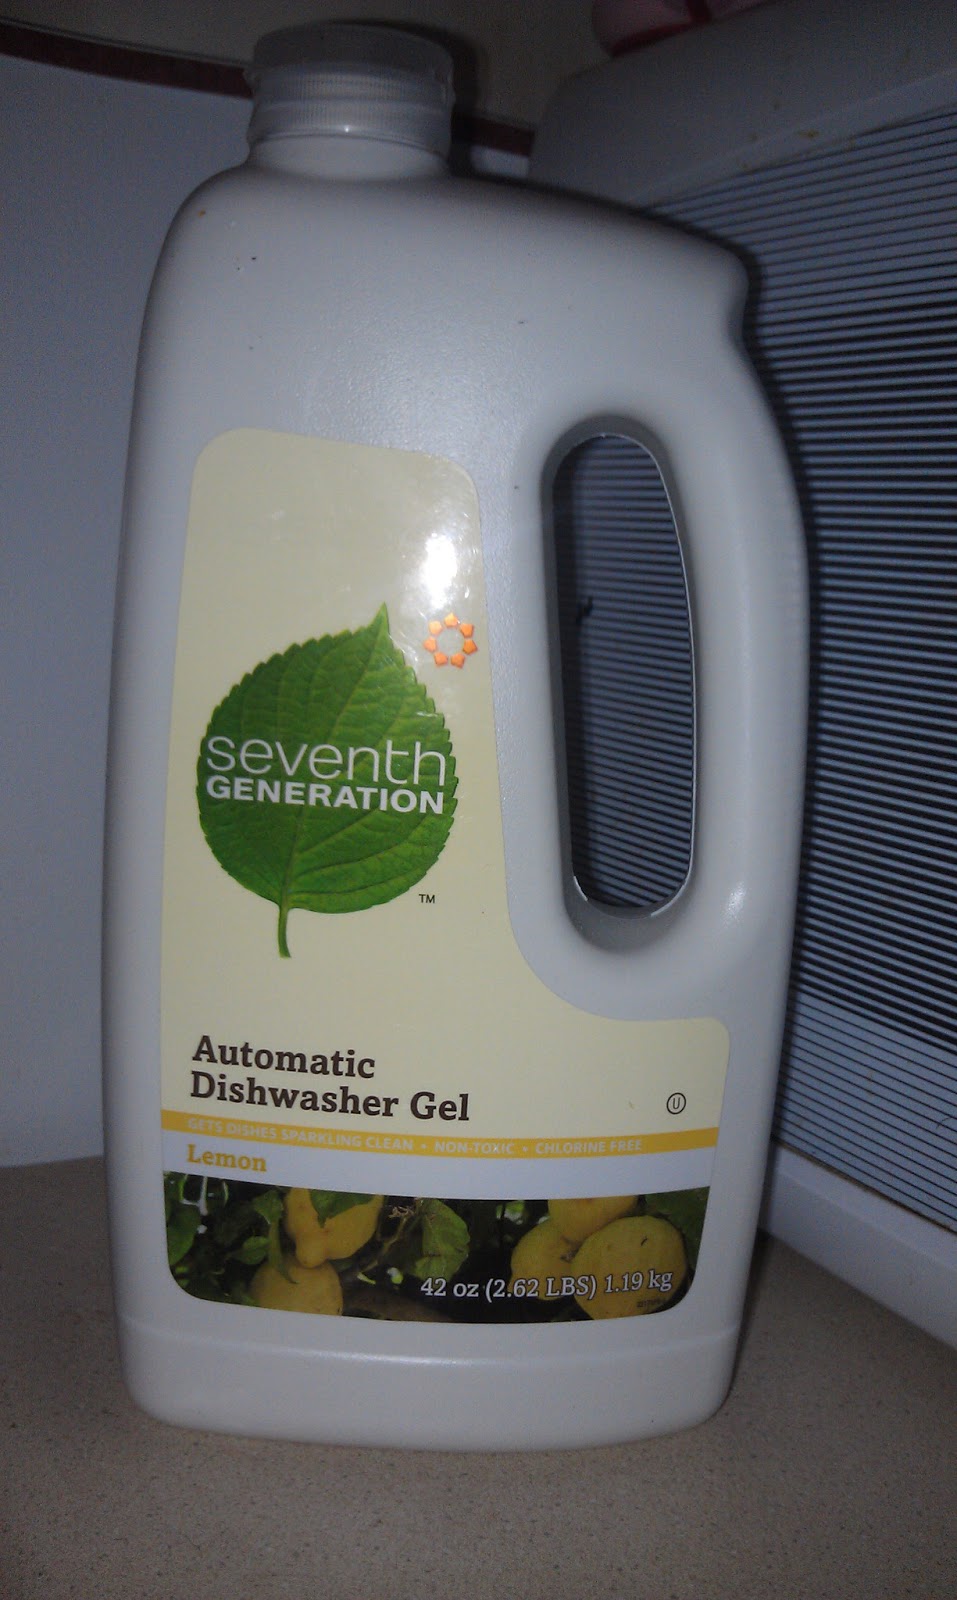
 I tried my usual seventh generation dishwasher cleaner a couple times.
 I tried seventh generation with a white vinegar chaser.
I tried baking soda in the washing compartment and a vinegar chaser.
It still looked bad . . verging on hopeless.
 When you search online for ways to clean beeswax off of your dishes you really don't come back with much. This fact is only made worse when you have a dishwasher full of really messed up, beeswax coated dishes.
Eventually I came across a post where a woman mentioned the use of Goo Gone. I don't have any and I don't know a lot of about what's in it. Did I mention it was also snowing?
Alright Pintrest don't fail me now. I looked up DIY Goo Gone, deciding to put whatever I came up with into the dishwasher and hope that I didn't make the problem 917,230,127,471,934,279,842,703,827,598,709,835,709,482 times worse - which at the rate I was going seemed a lock.
The first pin I clicked and began to look at involved vitamin E oil, already having a lot of other uses for my vitamin E oil and preferring not to use it for this until I had to I chose a different one.
This one called for a 1:1 ratio of baking soda and vegetable oil. I knew I had baking soda and was relatively certain that I had vegetable oil. I thought to myself, "I'm DOIN' this!" - not like I felt like I had much other choice at this point.
 Things get really serious in my kitchen pretty quickly.
 I mixed my 1:1 using the last clean measuring cup I could find.
 Mix it well - I only had about 4 spoons left, two of which were absinthe spoons, and another was an iced tea spoon.
 Classy right? For anyone interested my absinthe spoons are reproductions of the type Henri de Toulouse-Lautrec used.
 I poured approximately 1/3 cup of my goo gone into the washing compartment, turned on my washing machine and hoped my greatest hope that it would work.
 After a cycle through the washing machine things were looking a bit cleaner albeit they felt a little oily.

 Considering this a good sign I ran it again with my homemade Goo Gone to be followed up with vinegar.

 Still oily but everything looked clean enough to clean it the usual way. The result was a bit dissapointing. Still oily, looked cleaner than it all began, but it seemed quite a bit of residue was still there!

 I opted to change my game a bit and use this pin which calls to do the same thing as before but uses borax. I put the mixture on the dishes and left it to sit for a little while and then ran the dishwasher with the previous mix.
The dishes were improving but they still weren't coming out as clean as I needed. But after a day of trying to ash them the usual way and without any dish washing detergent and then today I needed a break. I'd have to try again the next day.
Wash, after wash, after wash, after wash, after wash and my dishes still looked like this.

I tried baking soda in the washing compartment and a vinegar chaser.
It still looked bad . . verging on hopeless.

Eventually I came across a post where a woman mentioned the use of Goo Gone. I don't have any and I don't know a lot of about what's in it. Did I mention it was also snowing?
Alright Pintrest don't fail me now. I looked up DIY Goo Gone, deciding to put whatever I came up with into the dishwasher and hope that I didn't make the problem 917,230,127,471,934,279,842,703,827,598,709,835,709,482 times worse - which at the rate I was going seemed a lock.
The first pin I clicked and began to look at involved vitamin E oil, already having a lot of other uses for my vitamin E oil and preferring not to use it for this until I had to I chose a different one.
This one called for a 1:1 ratio of baking soda and vegetable oil. I knew I had baking soda and was relatively certain that I had vegetable oil. I thought to myself, "I'm DOIN' this!" - not like I felt like I had much other choice at this point.


The dishes were improving but they still weren't coming out as clean as I needed. But after a day of trying to ash them the usual way and without any dish washing detergent and then today I needed a break. I'd have to try again the next day.
Subscribe to:
Posts (Atom)