Showing posts with label house. Show all posts

Friday, October 5, 2012

Pintesting - Chem-Free Cleaning - The Kitchen Sink

My kitchen sink can sometimes look . . . pretty gross.

As much as I'd like to blame it on my husbands it's my fault too.

Someone should be going behind the other to make sure things don't get to an unacceptable point. This is definitely not the worst it's ever looked but most certainly not the best.

Today's pin-test comes from the info found via this pin, all the info I needed was on the pin so I didn't really have to dig around on the source blog.

This is one of the quickest and easiest pin-tests I've done.

Sprinkle your sink with baking soda.

Spray with vinegar and then rinse your sink with super hot water. I didn't even bother scrubbing and my results were satisfying.

This one is definitely worth trying.

Monday, October 1, 2012

Pintested - Chem-Free Cleaning - Dishwashing Detergent (part III)

You can imagine how absolutely sick of dishes I must be by now. If it weren't bad enough that I was already doing multiple loads in a day - lately I've been getting nowhere, fast.

Today's pin-test from from the info here via this pin.

Considering how terribly this has all being going for me and that I read in the comments of someone's blog about home-made, chemical-free, cleaning agents that citric acid cancels out Castile soap somehow I wasn't feeling too confident that this would work.

It didn't. Again I had a bit of a chalky residue. I'm considering packing it in and just buying some Meyer or Seventh Generation . . . .


Friday, September 28, 2012

Pintesting - Chemical-free cleaning - Dishwashing detergent (Part II)

Unhappy with the way my last attempt at home-made dish-washing detergent was going I decided to try another recipe.

Today's pin-test come from the info here via the this pin.

The biggest change between my last dish-washing detergent and the one I tried today is the addition of lemi-shine and kosher salt. Feeling a bit hopeless at this whole home-made cleaning supplies thing I made only as much as this recipe called for rather than a large batch like I previously had. I'm glad I did.

Today's results were again disheartening. Upon opening my dishwasher and hoping to be removing my sparkling clean dishes I was met with that same chalky residue. At this point this particular load of dishes had gone through at least three times. I ran it once more, on heavy duty, with just water.

Residue. Frak.


Thursday, September 27, 2012

Pintesting - Chemical-free cleaning - Dishwashing detergent

I saw quite a few pins saying that a mixture of half borax and half washing soda would give you a good powdered dish washing detergent.

The first pass through the dishwasher left me really happy with the results but for whatever reason all subsequent uses of it left me with powdered residue on the dishes. Frak.

The use of white vinegar as mock Jet Dry in combination with the mixture didn't remedy the issue. Back to the drawing board I suppose.

Thursday, September 20, 2012

Pintested - Chem-Free Cleaning - Bathroom Sink

My bathroom sink frequently looks . . .disgusting. With my parents coming I couldn't possibly let my mother see the sink like this.

Today's pin-test comes from the info from here via this pin.

My husband usually shaves his head over our sink and then leaves his hair there to clog it for a pretty indefinite amount of time.

• DRAIN CLEANER: Pour 1/2 cup baking soda into drain followed by 1 cup vinegar. Let it sit and fizz for 15 minutes, then rinse with hot or boiling water. May need to repeat or leave baking soda and vinegar in overnight.

I was hoping the foaming action from the drain cleaning would leave me with nothing left to scrub - but this was not the case. On to round 2.

• SCOURING POWDER: Combine 1 cup baking soda, 1 cup borax, and 1 cup kosher salt in a jar. Sprinkle on area to be cleaned, wipe with a sponge, and rinse.

With all of the cleaning I've been doing I've pretty much run out of baking soda so i used 1/4 cup of each ingredient instead of a full cup.

In fact, I figured while I was at it I may as well scrub the entire sink area.
The back of the sink had also gotten a bit grody.

I was pretty happy with the results.

Was it worth a try? It sure was and I definitely recommend it.
 

Tuesday, September 18, 2012

Washing In My Own Laundry Soap

There's a chance my mother was even more excited about my first use of my home-made laundry soap than I was. In fact, right before she'd called I was already getting ready to wash some clothes.

When I first drained the detergent into the little cup that comes with the container it was that same watery consistency from when I first poured it in. I put a bit more in and started the washer. Still pretty nervous about the soap I stopped the washer about half-way through and poured some in from the other end (after a good shake.) Still a bit watery but nowhere near as clear or thin as it seemed before.

After I washed it you better bet this girl gave the laundry a sniff test before I went forward. I didn't smell a thing, no chemicals, no foul odor, not even wet clothes. Into the dryer they went while I started another load of laundry. For the second load of laundry I used vinegar as my fabric softener.

The consensus: I'm happy with yet another positive change being made in our household and say this one is worth a try for all of those who are interested.

Monday, September 17, 2012

Pintesting - Chemical-free cleaning - The Toilet (Take II)

As I mentioned in my previous post, the bathroom closest to my bedroom is used with enough frequency that leaving it with borax in it all night isn't much of an option.

Today's pin-test comes from the info here via this pin.

The before

15 minutes later

After scrubbing

The consensus: I was better off letting borax sit all night in the toilet

Monday, September 10, 2012

Pintesting - Chem-Free Cleaning - Laundry Detergent

The Christmas before my daughter was born my mother gave me a bottle of Dreft telling me that it was gold. Dreft, as it was explained to me was the laundry detergent I should be using to wash my little ones clothing. I was left with the impression that it was gentler and perhaps contained less of the harsh chemicals I was using on my husband and my own's clothing. Since that time I have been dutifully using Dreft to wash my little girls clothes.

But wait a minute! Why didn't I ever stop to think that if it wasn't so great for my little lamb to snuggle up in sheets washed in the same detergent I was using on my own, maybe the detergent I was using simply wasn't so great.

If you're using a chemical free laundry detergent there's should be no reason to have to do your childs' laundry in separate loads with and entirely different detergent. You're already saving money by only using one type of detergent rather than two.

Today's pin-test comes from the information I got here via this pin.

Grating Fel Naptha proved simpler than I expected. The soap is really soft so it grates quickly and easily. I was able to do it despite having a sprained wrist (on the side that would be holding the grater).

I opted to use empty containers from my husbands juice. He wasn't happy about this. Because the juices are so sweet he usually saves an old container and splits the juice equally between the containers and then adds water. When he realized there was really no talking me out of using his containers for a short while to make the new laundry detergent he told me what I already knew: to clean them very, very, very well because if I didn't and he mixed juice in a contaminated container he could get very, very, very sick. His faith in what I do and don't know is just amazing.

While I was constantly stirring the soap and water mixture there were more suds than I expected. I was pretty worried I'd already done it wrong. I soldiered on . . you know . . . for science (and because I can be a bit hard-headed and had nothing else to do anyway.)

The resulting pudding-like mixture left me feeling pretty satisfied and amused. I used a measuring cup to put the soap into the bottles. One cup in one bottle, One cup in the following, one cup in the last, one cup in the last, one cup in the center, and one cup in the first - then repeat until you run out of soap.

The tops of the bottles ended up getting a little messy.

I did my best to eyeball where the half-way point for the bottles was when I added the hot water.

Shaking up the mix was again, something that left me feeling more satisfied than I expected. It was a little bit fun.

Come morning I was hoping to find a gelatinous blob that would slide when I moved the bottle. My blob did not slide when you moved the bottle. I stuck a wooden spoon in and began breaking up the blob. Then I filled the bottles the rest of the way with hot water. You will need to do a lot of shaking to get your detergent to mix well. I thought my husband would have done well enough but when I began transferring the mix to an empty detergent container it was downright watery. The reason for this was that there was still quite a huge blob left untouched by the shaking. So really go to town on the shaking.

I actually ended up rendering two of the jugs (in my opinion) useless. My husband was cleaning out one of our very messy rooms and throwing things away. Wanting to see what he was throwing away with reckless abandon I headed out to our trash can to look through the boxes. Aside from a $300+ pair of jeans I found some shirts that would make perfect baby rompers and some rose scented laundry water.

Without checking the label I added the laundry water to two of my jugs. When I checked the label I saw that it contained "fragrance", which I now know is a synthetic, toxic, ingredient. I was still able to completely fill our emptied laundry detergent container. I'll need to make more to replace the Dreft but next I plan to replace our fabric softener.

Friday, September 7, 2012

Pintested - Chem-Free Cleaning - Pans

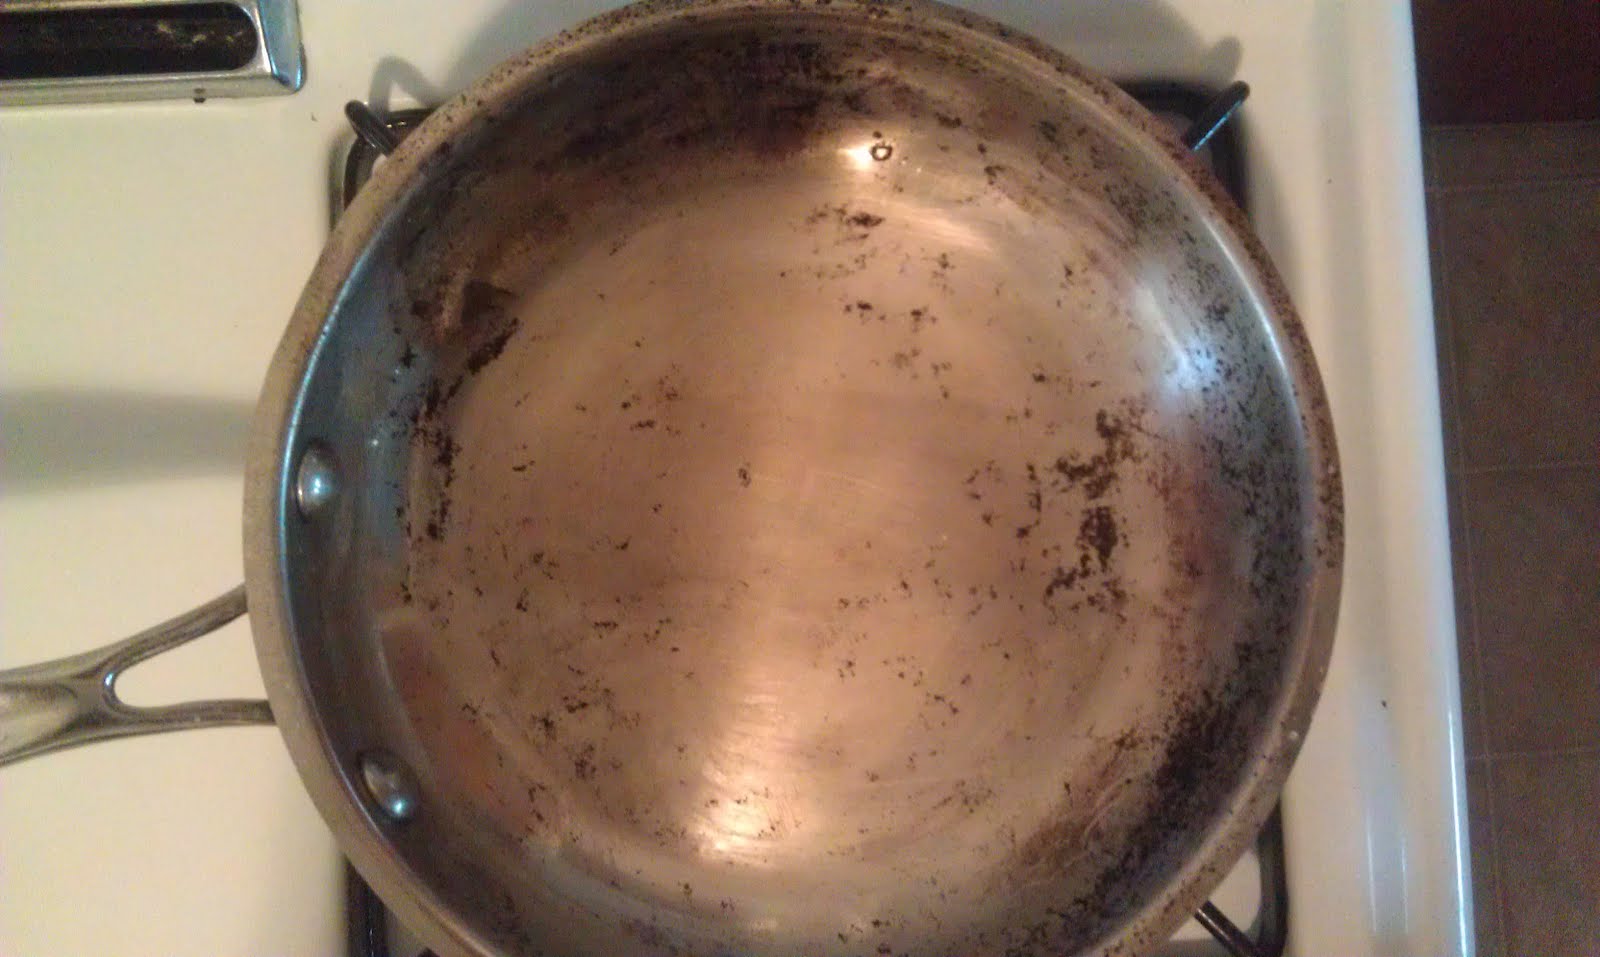
Even after my last two cleanings and a trip through the dish washer my husbands pan was still just not clean enough for me.

Today's pin-test comes from this pin, all the info you need is actually right there on the pin.

I filled the pan with 2 cups of cold water and then added 3 tablespoons of kosher salt. Knowing that if I just left the pan sitting in the sink I moved it into the laundry room to sit overnight (actually I filled the pan that afternoon instead of that evening but this pan needed help!) I also made sure to spread the salt over the problem areas.
Here's what the pan looked like the next morning.

Not a whole lot of change if any. Not feeling too confident this would actually work I put the pan on the stove and heated it on medium - or as close to that as I can assume it is since I have a gas stove.

The only thing this experiment accomplished was creating a hot, salty crust around the edge of my pan. The treatment did nothing for the pan. The pin says that this can take a few tries but I feel unconvinced that multiple tries would result in a nice, clean pan.

Would I say this is worth trying? No, save yourself the time and effort.

Thursday, September 6, 2012

Pintested - Chemical-Free Cleaning - Microwave

I'm thankful to be able to tell you that my microwave is not regularly a hang-my-head-in-shame mess. But I do periodically find myself with a larger share of splattered food than I'd like in there.

Somehow it seems there's a lot of people who aren't aware of the problem this mess poses in relation to how well your microwave cooks food. The short and sweet explanation of what I mean by this is: when you have a microwave coated with food splatters, each time you use it, your microwave will expend a portion of its energy to once again cook those food splatters. More splatters - less even or concentrated cooking.

Today's pin-test comes from the info I found here as a result of following this pin.

My microwave was already "acceptably" clean but it had once again been a while since it's last cleaning.


I assembled the things I would need to begin cleaning. Once they were I jumped right in.

I really want to be able to tell  you that I walked down the hallway and smelled the magnificent aroma of vanilla wafting towards me but no such thing happened.

Did the dirt/grime/grease/food residue just wipe right off as websites with similar solutions boast? Not really. However, this one did at least tell you how long to microwave the water. I've seen some that just tell you to microwave whatever the mixture is and not tell you mixture amounts of microwave times.

Here is what the microwave looked like after merely wiping it down after doing as instructed.

Although some things did seem to wipe away with ease, I didn't get the end result I was hoping for. What's a pinner to do? Dip your UnPaper towel into the warm vanilla water mixture and scrub the microwave with it.

Although I saw more positive results there's definitely still some residue left that will need to be removed.

Monday, September 3, 2012

Chemical to Chemical-Free

My little girl has reached the point where I find her looking in all cabinets within reach so I really can't think of a better time to just jump in and replace all those dangerous chemicals.

First I collected 99% of our cleaners and toxic chemicals (I decided to go ahead and finish up the bottles of laundry detergent and children's laundry detergent. I may dispose of what's left of the cleaners or just finish using them. My end game plan is to reuse the containers.)

Then I went to the store and returned all of the unopened containers and exchanged them for greener options. It's not a perfect system putting those toxins right back out there but I don't really have too many pennies to spare.
Now to begin making at-home chemical-free cleaners.

Friday, August 31, 2012

Second Round - Ridding My House Of Toxic Chemicals

The next day I checked a few more products and found more things that needed to be removed.

I'm planning to re-use the shampoo bottles by filling them with home-made shampoo.

Tuesday, August 28, 2012

Pintesting - Chemical-Free Cleaning - Pans

I'm involved in a constant struggle to keep scorch marks off of three of our pans.

One of these, I've just come to think of as my husbands own personal pan. I insisted he begin using that particular pan years ago when I couldn't stop him from using metal utensils in my expensive, Tupperware, non-stick pans. My desire to die from some sort of heavy metal poisoning as a result of his scraping at burning food isn't what perhaps he thought it was. Since then he's been content to cook using almost exclusively "his pan."

I've posted about this struggled once before on my most recent blog - but this war wages on. No longer feeling the scrubby pads that had been sitting in the sink for months, usually under dirty dishes were still good - I threw them out. My first plan of attack involved elbow grease, baking soda, and one of my UnPaper towels. I made a small amount of progress but nowhere near the amount I needed.

What are you to do these days in your time of need? I turned to Pintrest.

My "Green" board on Pintrest has been quickly been filling up. For this task I chose to use the info provided by this pin.

It wasn't until I'd already begun cleaning the pans that I realized I should make a post about this and have before and after pictures. However, if you follow the hypertext link to my first post about these pans you will see what his pan regularly looks like.

Here is what the pans looked like after one round of following the directions of that pin to the letter.


Each of the pans had 1 cup of water which was boiled with 1 cup of vinegar. It's at this point that the original poster notes that should already be seeing a positive difference in your pan. This was not the case for me. Perhaps having scorched her pan from leaving it on a hot plate too long left a mess easier to clean the burnt on food residue my husband so dutifully leaves on these pans.

Once the water boiled 2 tablespoons of baking soda was added. The massive fizzing that resulted was incredibly satisfying.

I didn't really like a second round of cleaning left me with anywhere near the result I expected from the first. Would I call this a fail? No, I did make some much needed headway. It's worth a try - everyone's scorched pan story will vary and I should think so would their results.

Monday, August 27, 2012

Paper Towels Of My Un

Stan Smith: I'll give you $48 to assimilate.
Ma Ma: Shoes off in house.
Stan: What are you...? You don't have to wash paper towels. I'll buy more.
Ma Ma: Wasteful! You waste. Every penny counts.

                                                                           - American Dad, "Big Trouble in Little Langley" husbands

UnPaper towels, or as my husbands grandma  said (successfully taking some wind out of my sails) dish towels - another simple solution when it comes to needless waste.

I found out about UnPaper towels one day while wandering around on Pintrest and was pretty much immediately obsessed.

The idea of using shop towels, wash cloths, or other similar items reoccurred to me while I was reading Green Mama: the guilt free guide to helping you and your kids save the planet. Realizing the possible savings I told my husband that from then on, before he reached for a paper towel to think if this was a job that really needed a paper towel or if it could be just as easily taken care of by using a regular towel. Although he's not against using a towel to clean a mess rather than a paper towel, the walk down the hallway to the linen closet trumped ditching paper towels.

This was just the excuse I needed to begin making my own UnPaper towels. Having them in the kitchen and by the sink should be the incentive he needs to help us save pennies. Maybe having the last of the commercial paper towels under the sink will result in the same reaction of doing what's easiest.

Right now they aren't ready to go on a roll yet so I'll just have to make a space next to the sink for now. Hopefully I'll have these finished up very soon.


Lessons learned from this experience:
1) If you're not sure why your rotary cutter isn't getting anywhere - check to make sure the blade is out
2) Terry cloth isn't as easy to cut as you'd think
3) Using a cutting mat that is only 35 x 35 to cut yards and yards of fabric is kind of the suck

Tuesday, August 14, 2012

Gardening With Granny

I've been spending a lot of time with my husbands grandmother lately. Under the carport I saw this:

What a clever idea!

Tuesday, July 31, 2012

Etsy Trade Tuesday - Love For Earth

Living in Columbus has definitely been an experience. Columbus has a bohemian aspect similar to my native Fredericksburg, Virginia; but here I noticed that a lot of people do trades. I've known small local business owners to trade wares for services or goods from others. I've seen these trades fail but more often I see them become great successes for the involved parties. Having recently lost the Etsy shop I spent the last six years of my life working on, I now have stock that I don't have too much use for, in fact, it's taking up quite a bit of space. Another recent life change for my family and I has been our choice to increase our green actions. This has left me with a renewed love for green products, in this case re-usable sandwich/snack bags. I didn't have enough Tupperware containers to cover a weeks worth of packed lunches for my husband and found myself using DUN DUN DUUNNNNNNNN . . . ZIPLOCK BAGGIES! Enter, the reusable sandwich bag. Despite my general annoyance for how Etsy handled the harassment that lead to the close of my shop my love of handmade, particularly hand-made in the USA, has kept me continuously perusing Etsy. Yes, you can easily find an online tutorial to make your own sandwich bags and if you don't like the ones you find, I'm certain people out there have patterns you can pay for. Having a 16 month old doesn't leave me with a lot of time to sew (a problem only made worse by my Pintrest obsession that only adds to the list of things to knit or sew). My current living situation hasn't left me with enough space to set up my own sewing machine here at the house so I drive over to my husbands grandmother's house and use hers. Enter the wonderful Kara K. of Love for Earth on Etsy, added bonus - she lives in my home state!
Kara enjoys making unique, custom, eco-friendly bags and it really shows through in her work. We agreed upon a trade and when the two of us set to work fulfilling our ends of the bargain. Not only did I get an insulated snack/sandwich bag but she made me a custom bag as well! I told her my woes of forever having my hands full and my usual inability to juggle two giant Jersey Mikes subs. Jersey Mikes subs don't come with bags with handles. After discussing the length of a giant sub from Jersey Mikes (15") and determining what the width of two of them should be, she created a special, insulated,
Jersey Mikes sub carry bag
- WITH STRAP!
I luuuuuuuuuuuuuuuuuuuurv it! The quality is out of this world! About a week later my other bag came (she too was excited about our arrangement and forgot to send the other bag) and it too was wonderful. It even came in recycled packaging!
Tell Kara your reusable bag woes and you'll be sure to walk away with a custom creation that you'll love.